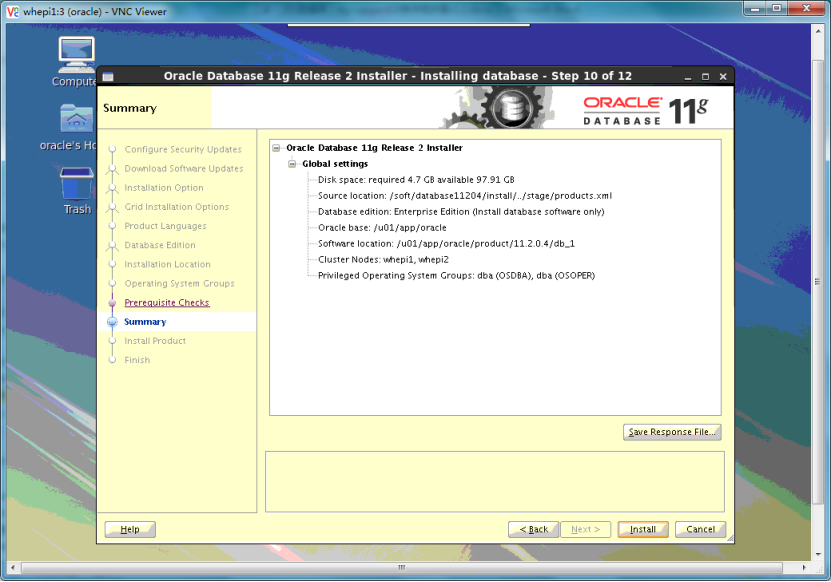
8、安装11.2.0.4数据库软件
在节点1中ROOT用户运行这个脚本
[root@whepi1 ~]# su - oracle
[oracle@whepi1 ~]$ cd /soft
[oracle@whepi1 soft]$ unzip p13390677_112040_Linux-x86-64_1of7.zip
[oracle@whepi1 soft]$ unzip p13390677_112040_Linux-x86-64_2of7.zip
[oracle@whepi1 soft]$ chown -R oracle:oinstall database
[oracle@whepi1 soft]$ chmod -R 775 database
首先以 grid 用户运行如下的命令进行检查环境配置:
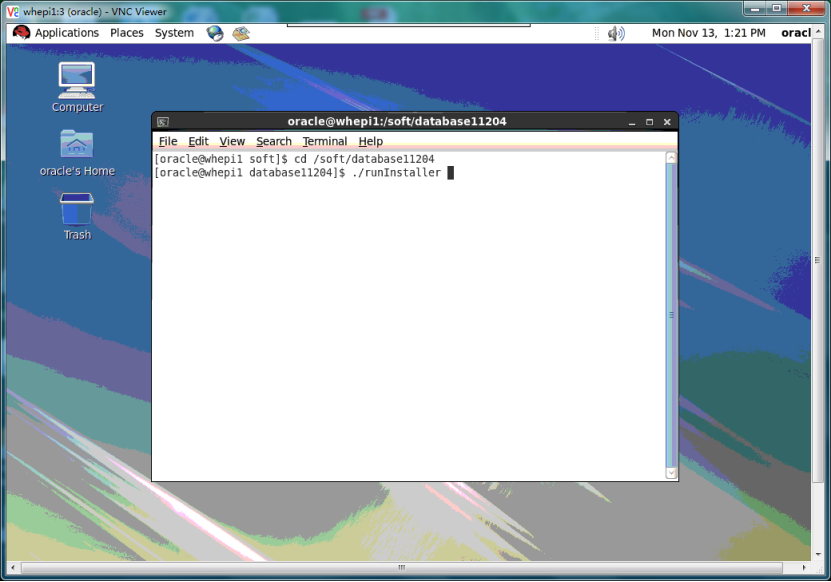
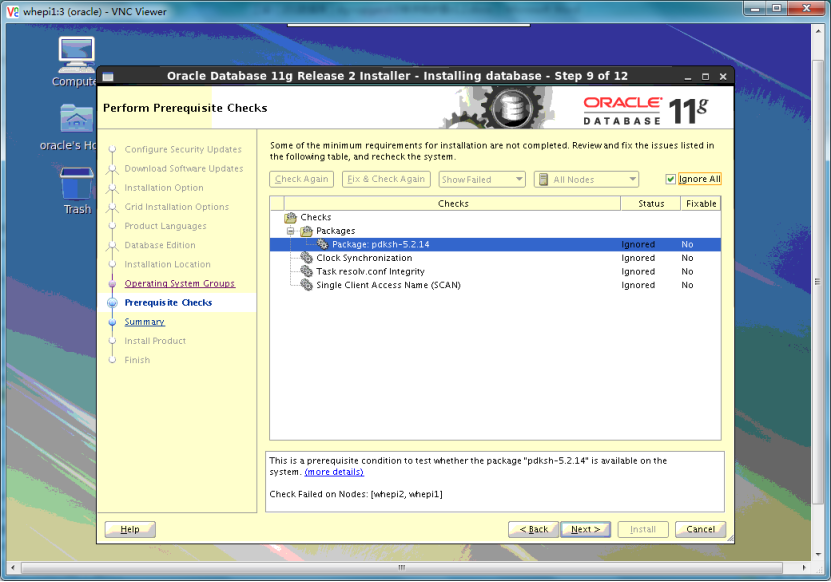
/u01/grid/runcluvfy.sh stage -pre dbinst -n rac1,rac2 -verbose -fixupVNC用oracle用户安装,可视化安装
图如下所示:

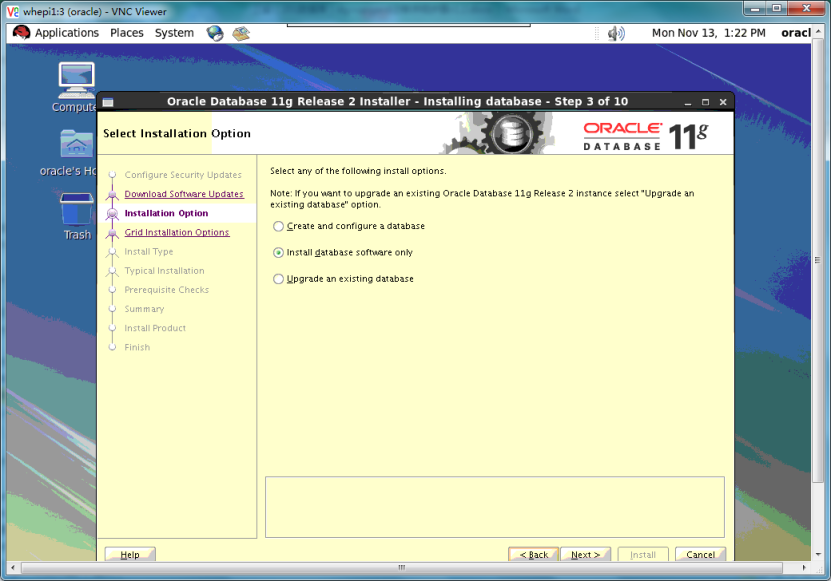
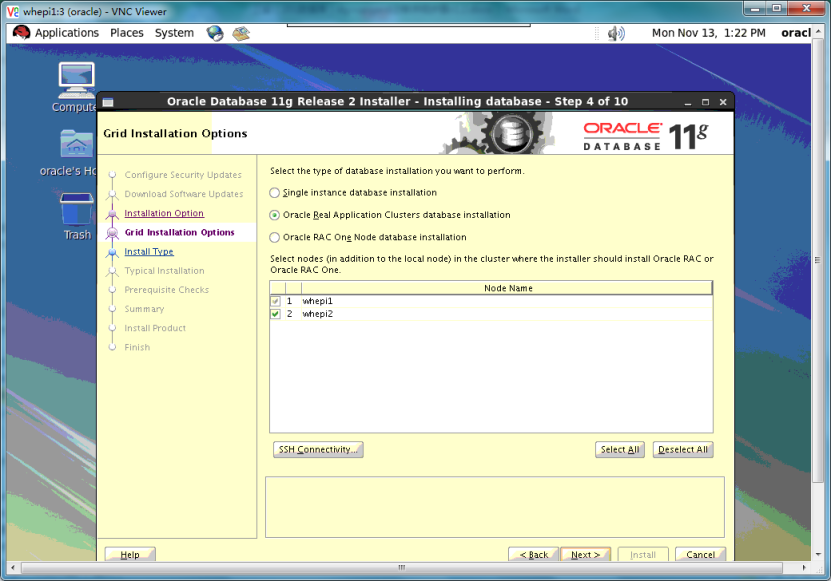
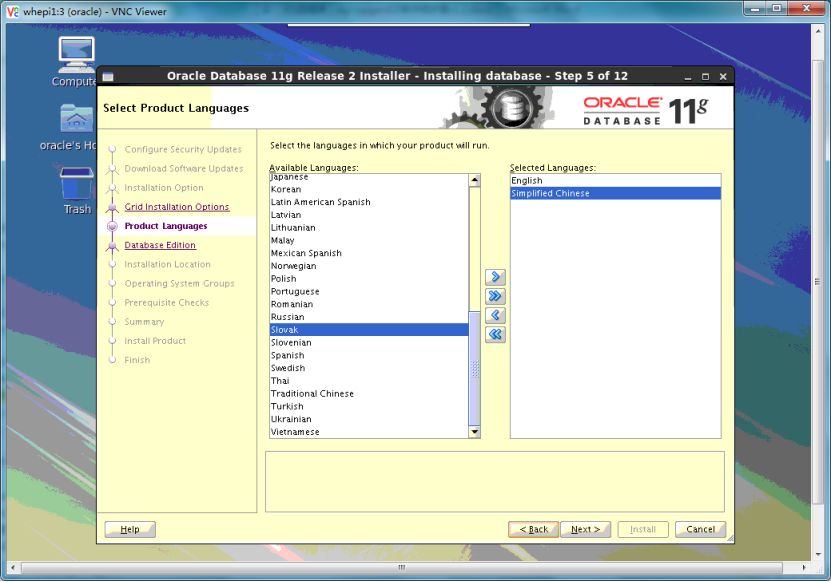
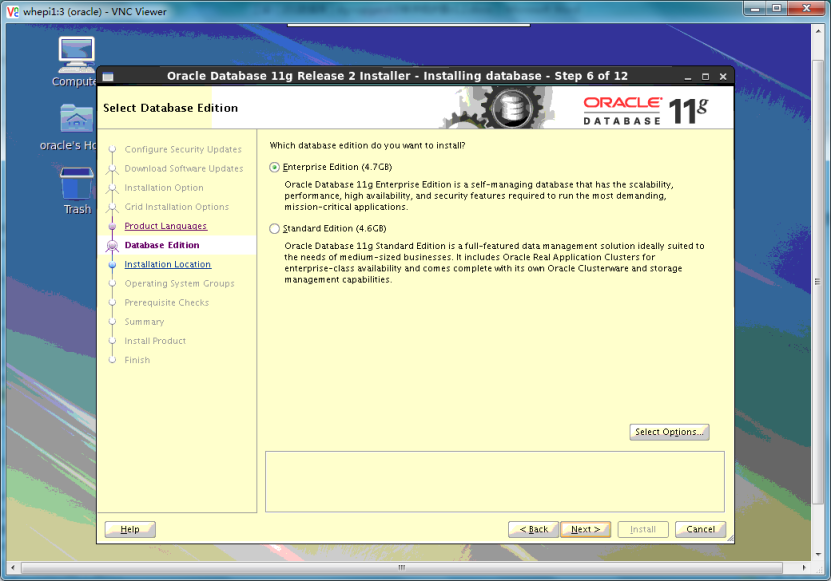
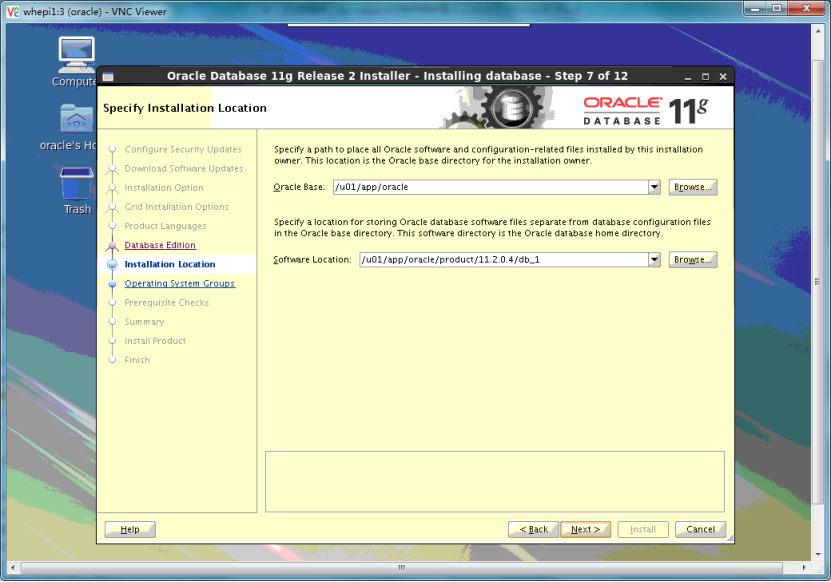
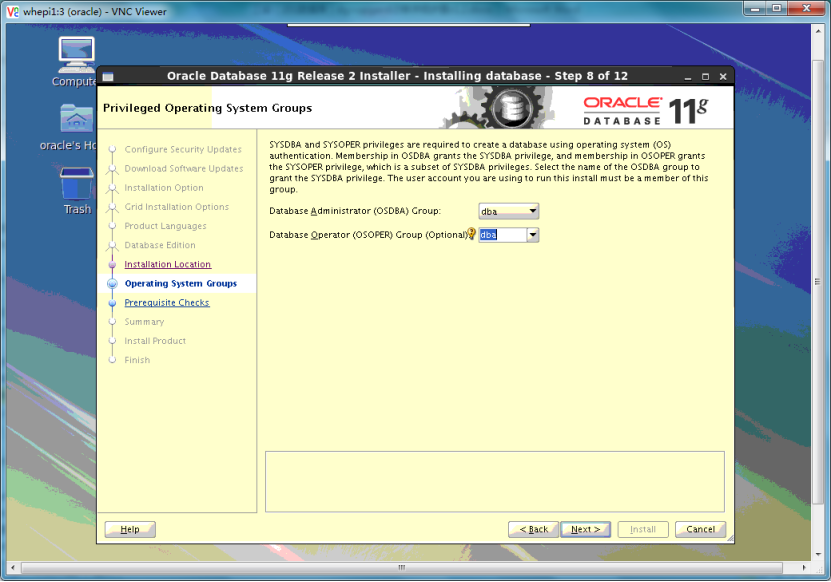
以下图中忽略如下报错
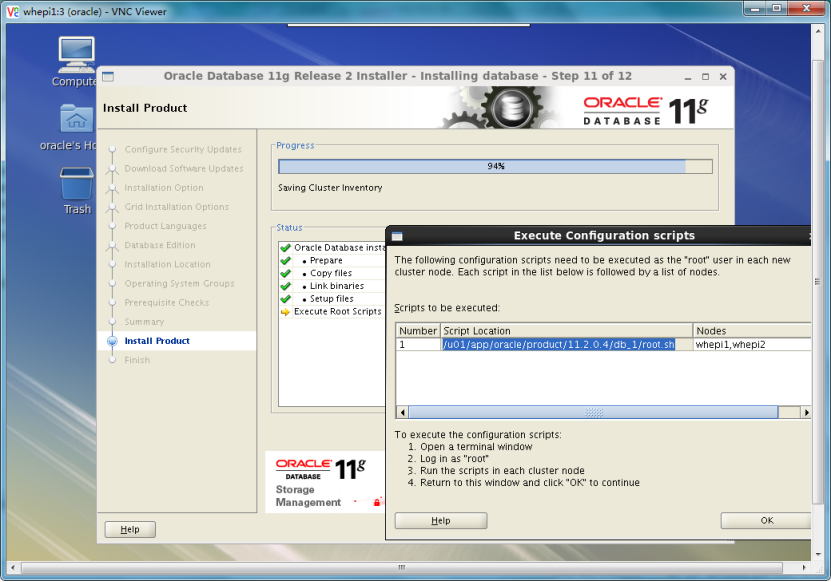
以上脚本2个节点都要用root用户执行。
9、给11.2.0.4数据库打PSU补丁
2个节点都要:
升级OPatch
[root@whepi1 soft]# su - oracle
[oracle@whepi1 ~]$ cd /soft/
[oracle@whepi1 soft]$ unzip database_psu_p26609445_112040_Linux-x86-64.zip
[oracle@whepi1 ~]$ cd $ORACLE_HOME
[oracle@whepi1 db_1]$ mv /u01/app/oracle/product/11.2.0.4/db_1/OPatch/ /u01/app/oracle/product/11.2.0.4/db_1/OPatch_bk20180430/
[oracle@whepi1 db_1]$ exit
logout
[root@whepi1 soft]# cp -R /soft/OPatch/ /u01/app/oracle/product/11.2.0.4/db_1/
[root@whepi1 soft]# chown -R oracle:oinstall /u01/app/oracle/product/11.2.0.4/db_1/OPatch
[root@whepi1 soft]# su - oracle
[oracle@whepi1 ~]$ cd $ORACLE_HOME/OPatch
[oracle@whepi1 OPatch]$ ./opatch apply /soft/26609445/
检查
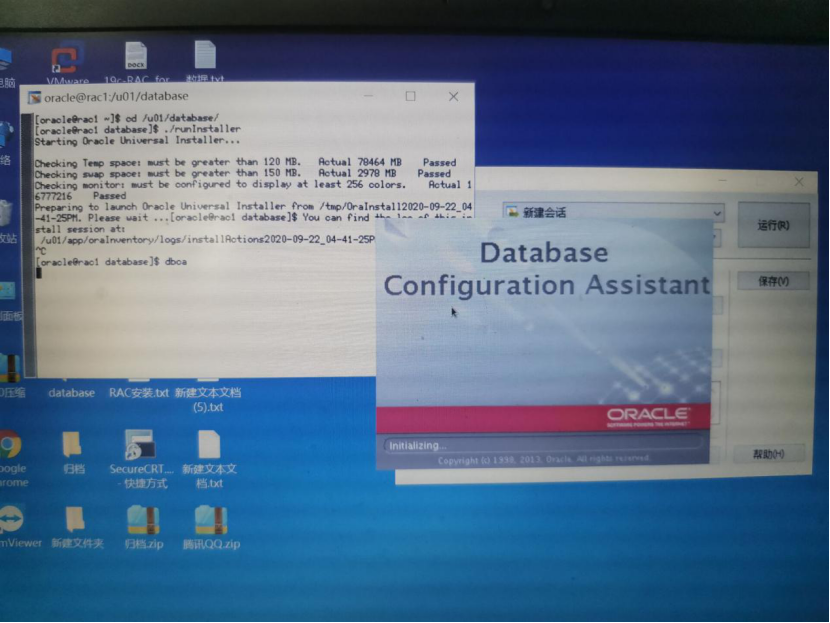
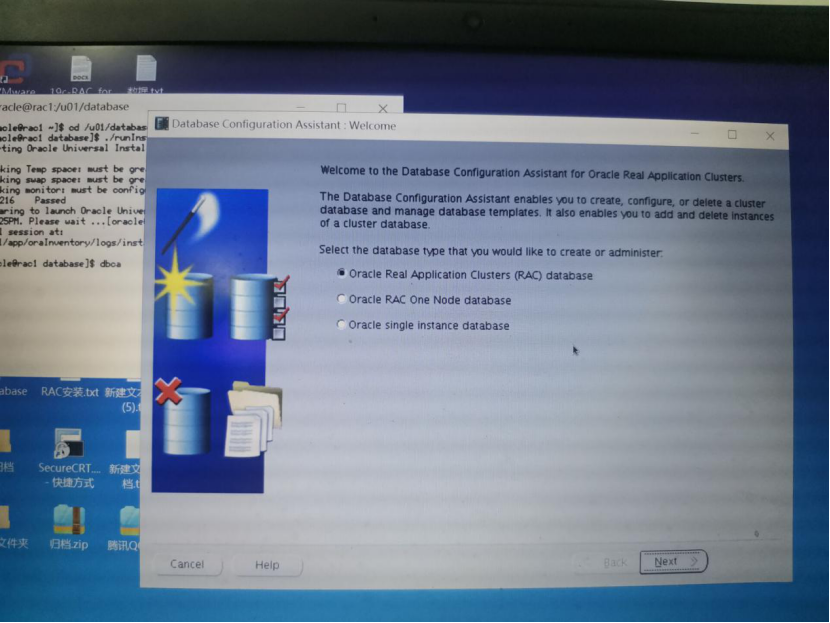
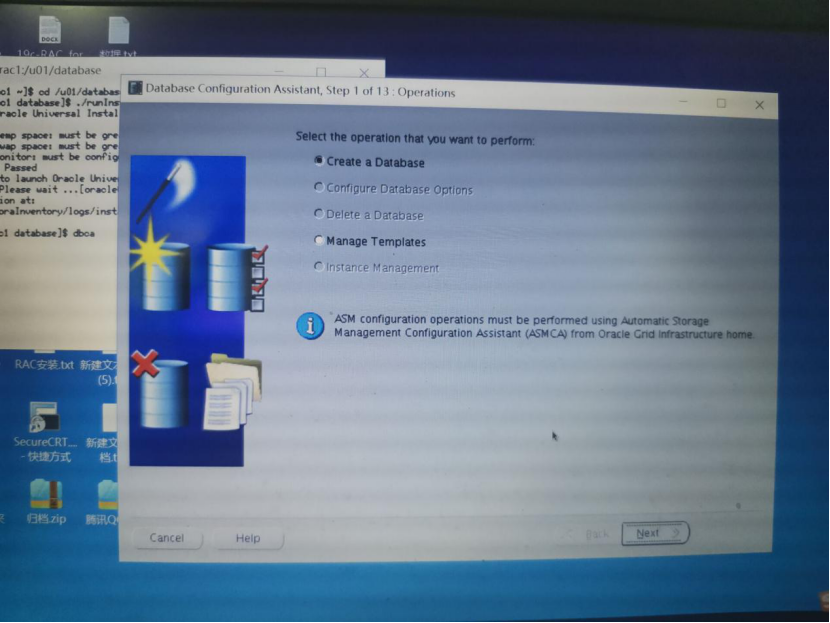
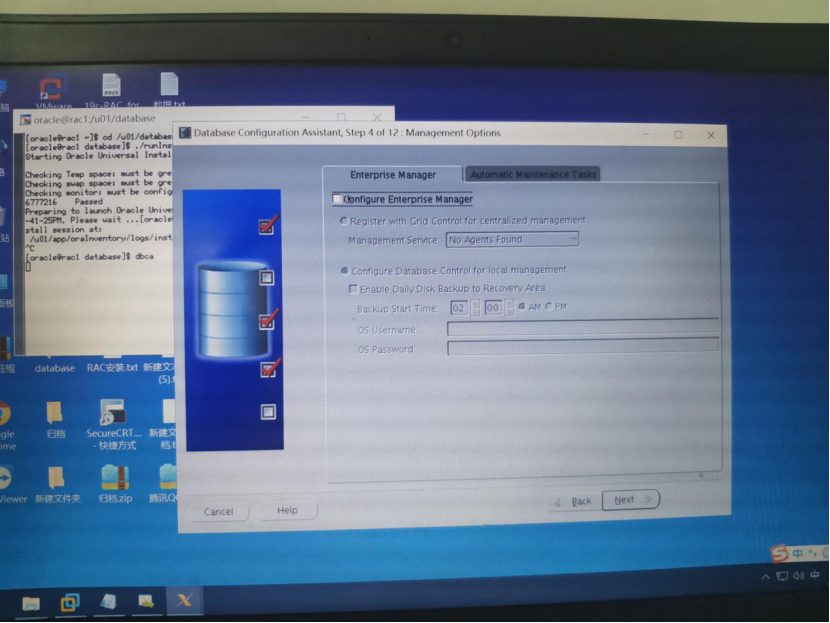
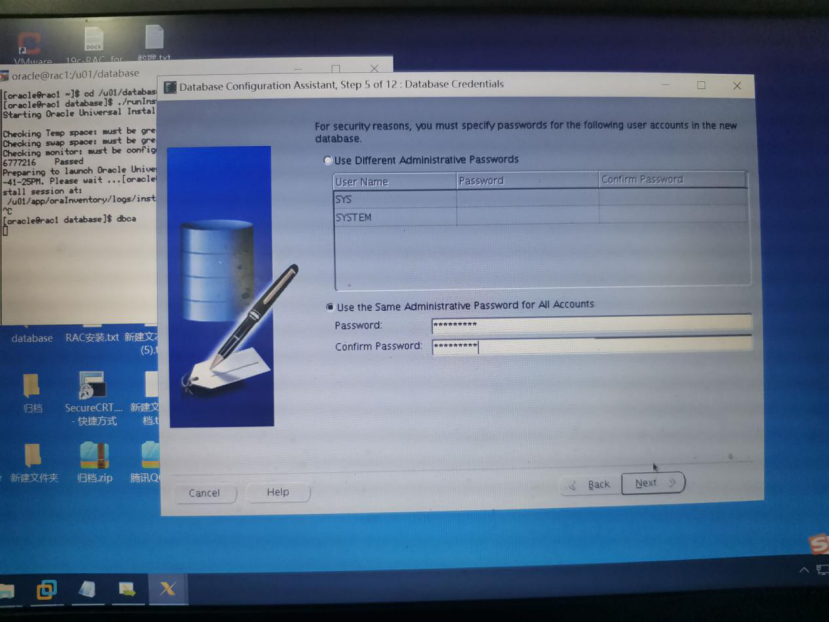
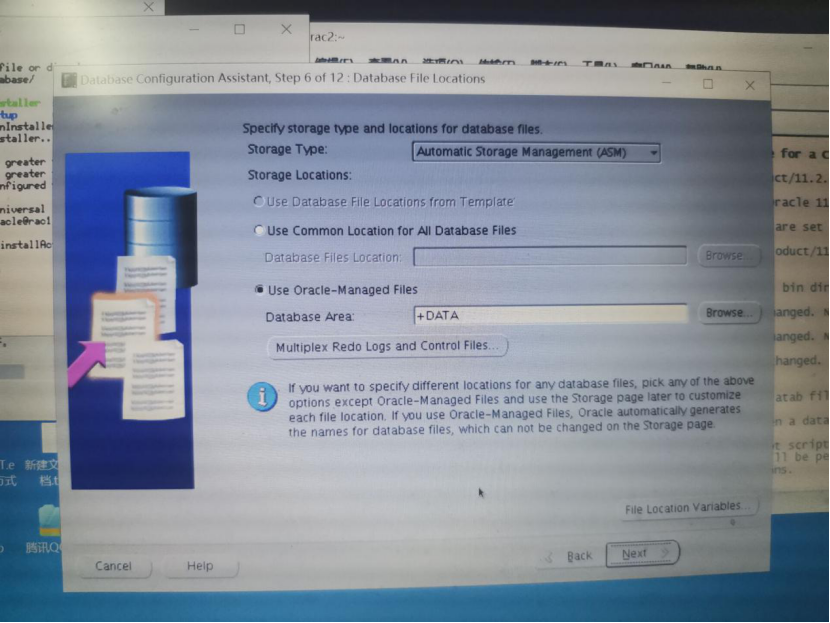
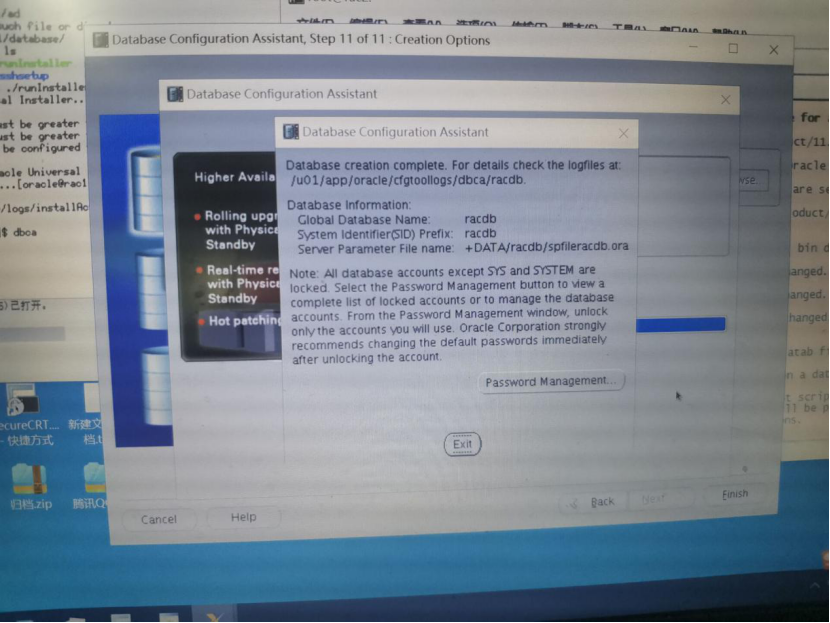
./opatch lsinventory10、dbca实例
打开监听
lsnrctl start
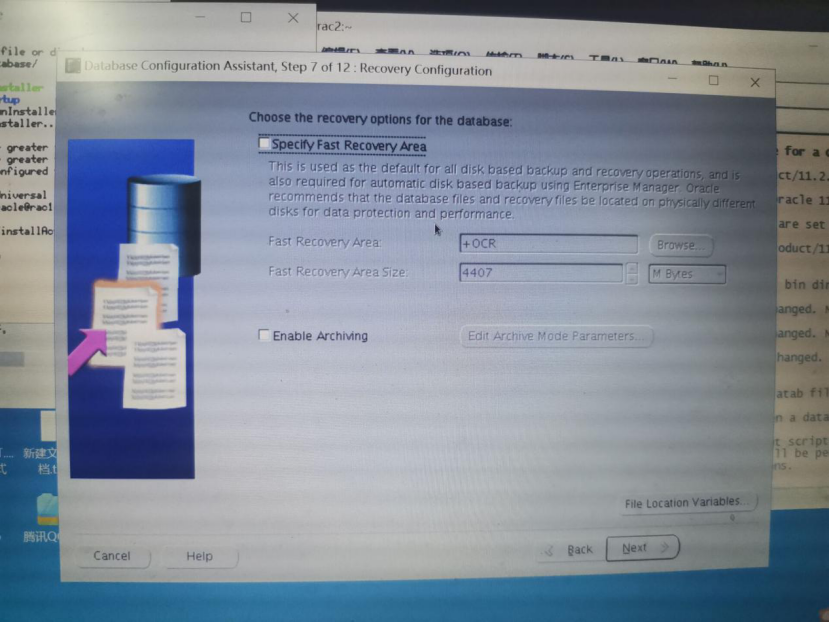
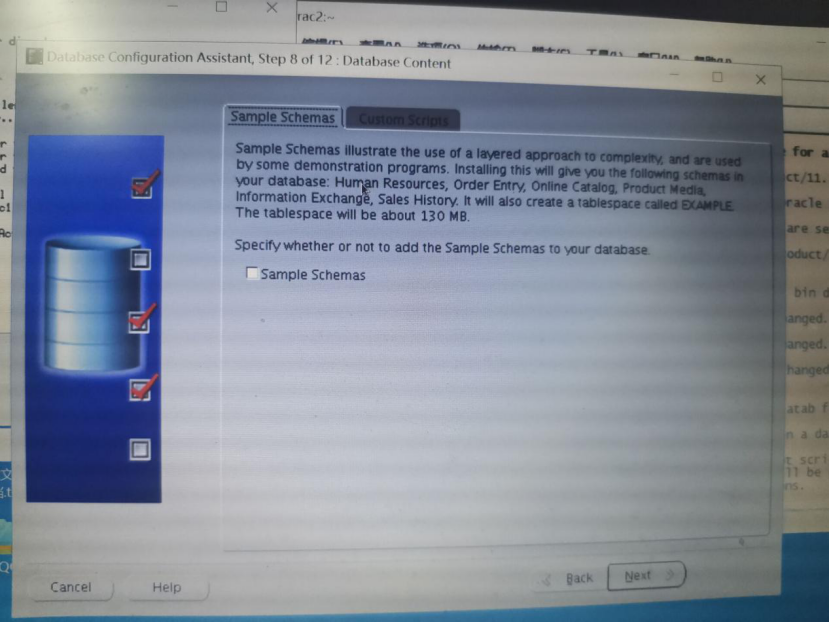
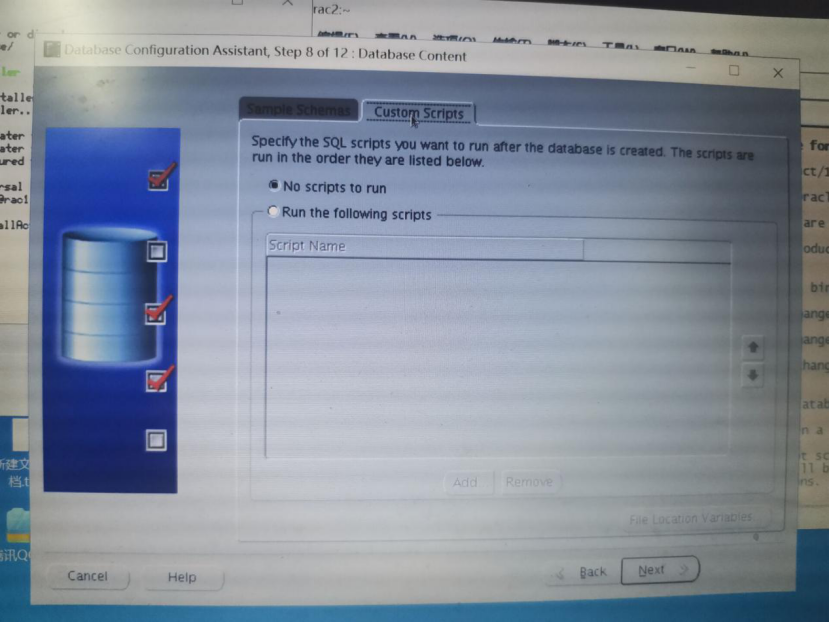
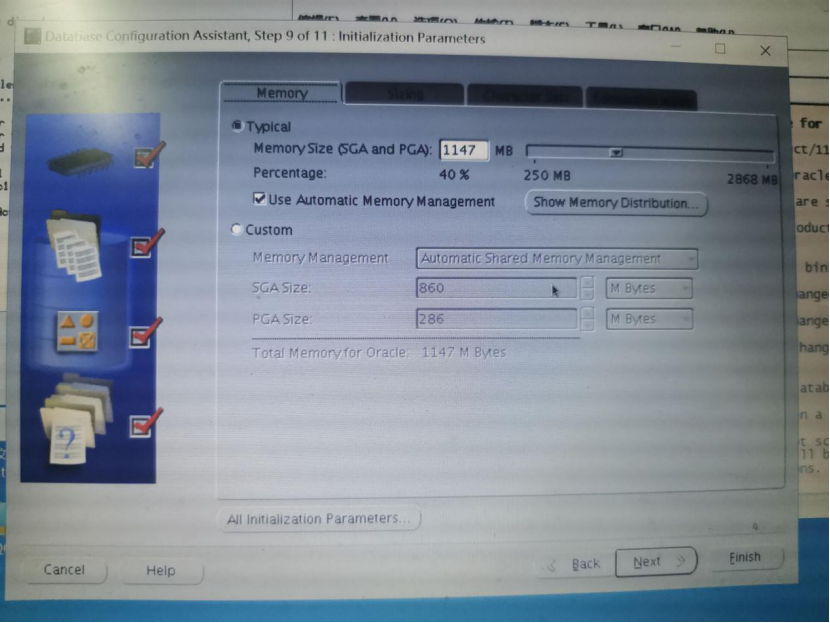
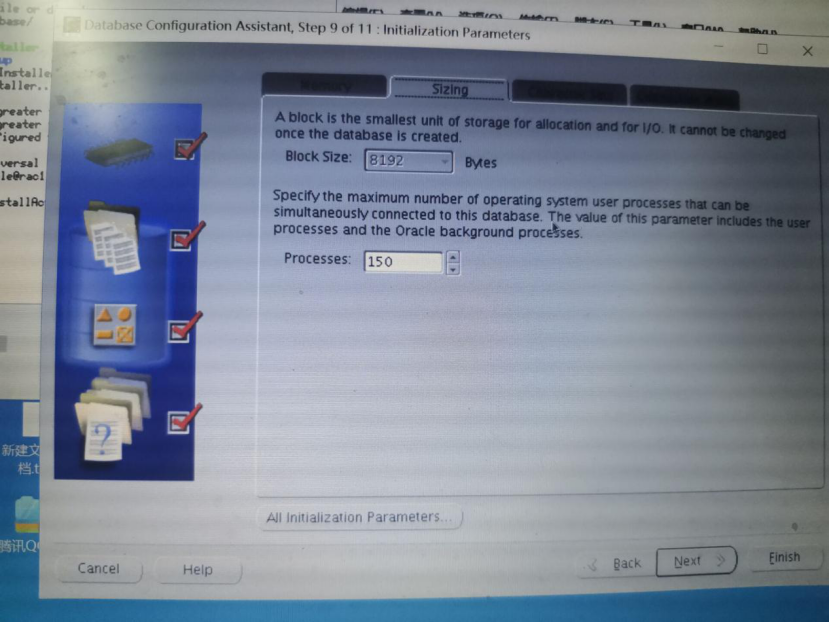
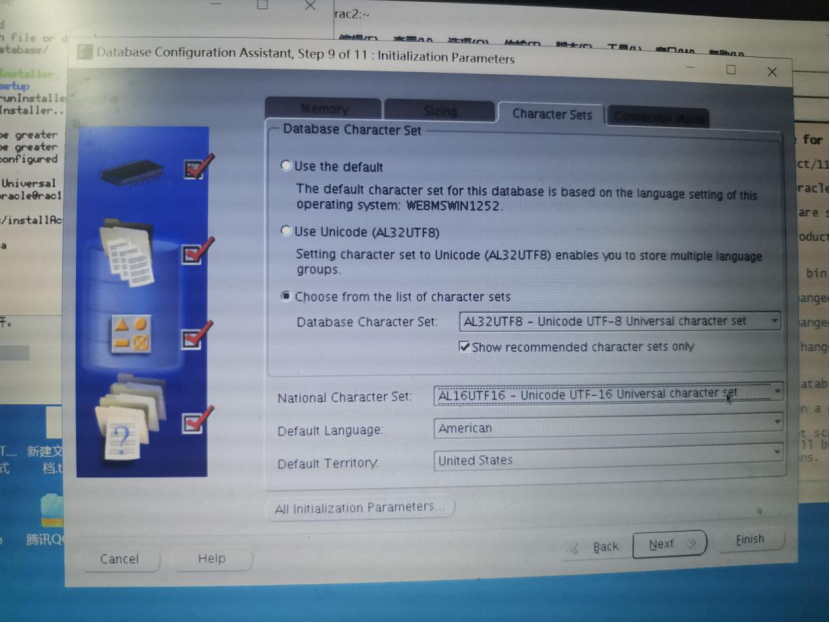
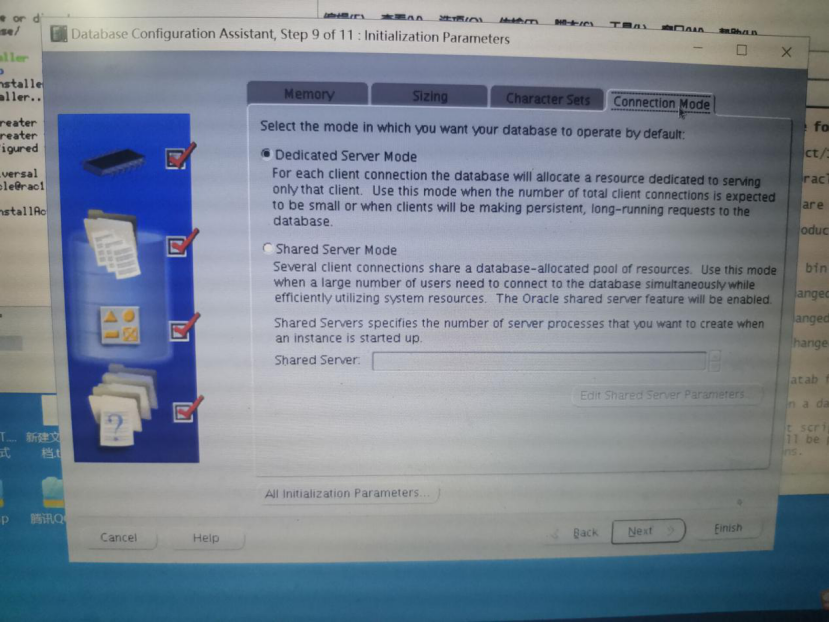
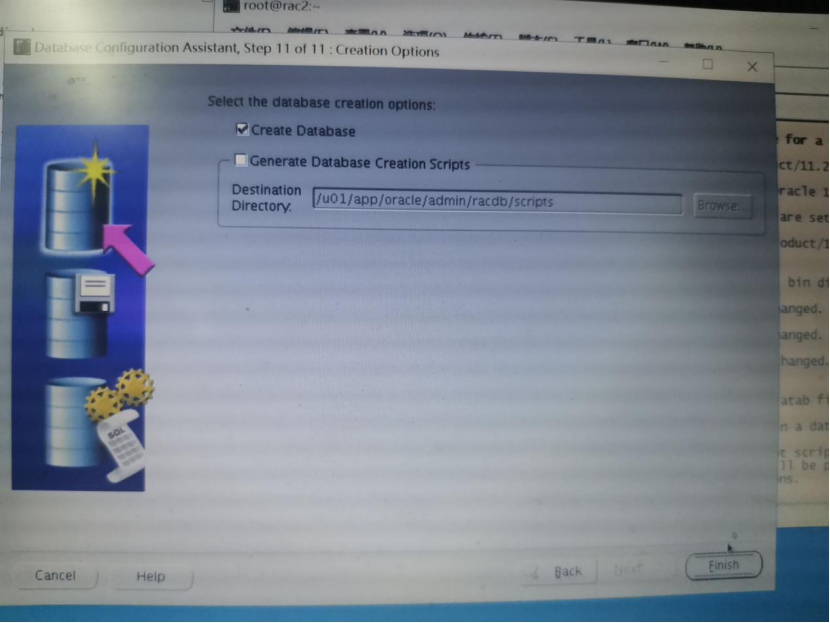
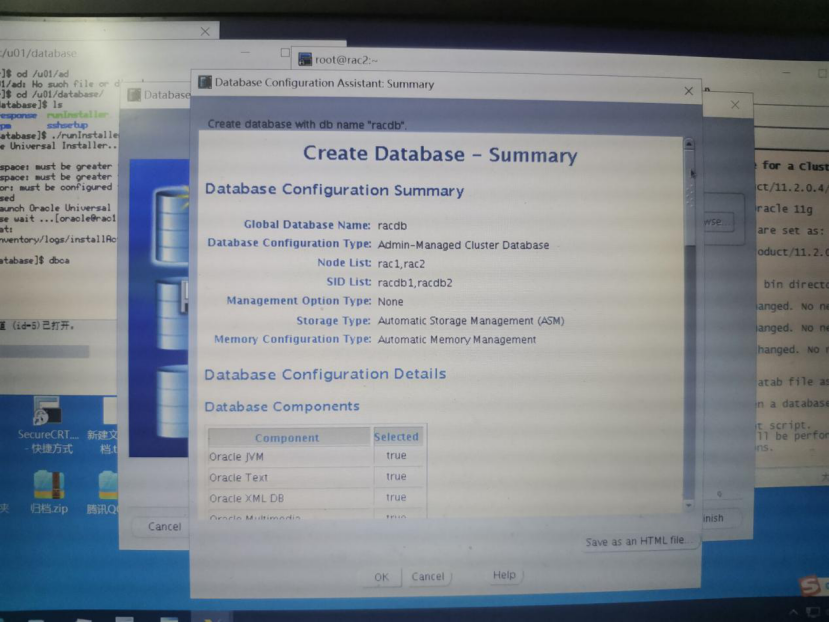
dbca图如下所示:


11.建议数据库
sqlplus / as sysdba]
select * from dual
数据安装成功,实例安装成功。