实验环境:Redhat 6.8(12c在linux上最低运行版本为6.4以上)   Oracle 12c 12.2.0.1

ip:192.168.0.10   hostname:oracle
1、安装rpm包(2个节点都要配置),配置yum源
mount  /dev/cdrom /mnt

vi /etc/yum.repos.d/ol.repo
[local-source]
name=ol
baseurl=file:///mnt/
enabled=1
gpgcheck=0
gpgkey=file:///etc/pki/rpm-gpg/RPM-GPG-KEY-oracle

安装rpm

yum install xterm bc* binutils* compat-l* e2fsprog*  glibc-2.*  glibc-de*  ksh* libgcc-4*  libstdc+*  libaio-0* libaio-d* libXtst-* libX11-1*  libXau-1* libxcb-1* libXi-1.*  make-3.8* net-tool* nfs-util* sysstat-* smartmontools* gcc-c++* xorg-x11-xauth
具体见官方文档:
https://docs.oracle.com/en/database/oracle/oracle-database/12.2/cwlin/operating-system-requirements-for-x86-64-linux-platforms.html#GUID-3F647617-7FF5-4EE4-BBA8-9A5E3EEC888F
包含
bc
binutils-2.20.51.0.2-5.36.el6 (x86_64)
compat-libcap1-1.10-1 (x86_64)
compat-libstdc++-33-3.2.3-69.el6 (x86_64)
compat-libstdc++-33-3.2.3-69.el6 (i686)
e2fsprogs-1.41.12-14.el6 (x86_64)
e2fsprogs-libs-1.41.12-14.el6 (x86_64)
glibc-2.12-1.7.el6 (i686)
glibc-2.12-1.7.el6 (x86_64)
glibc-devel-2.12-1.7.el6 (x86_64)
glibc-devel-2.12-1.7.el6 (i686)
ksh
libgcc-4.4.4-13.el6 (i686)
libgcc-4.4.4-13.el6 (x86_64)
libstdc++-4.4.4-13.el6 (x86_64)
libstdc++-4.4.4-13.el6 (i686)
libstdc++-devel-4.4.4-13.el6 (x86_64)
libstdc++-devel-4.4.4-13.el6 (i686)
libaio-0.3.107-10.el6 (x86_64)
libaio-0.3.107-10.el6 (i686)
libaio-devel-0.3.107-10.el6 (x86_64)
libaio-devel-0.3.107-10.el6 (i686)
libXtst-1.0.99.2 (x86_64)
libXtst-1.0.99.2 (i686)
libX11-1.5.0-4.el6 (i686)
libX11-1.5.0-4.el6 (x86_64)
libXau-1.0.6-4.el6 (i686)
libXau-1.0.6-4.el6 (x86_64)
libxcb-1.8.1-1.el6 (i686)
libxcb-1.8.1-1.el6 (x86_64)
libXi-1.3 (x86_64)
libXi-1.3 (i686)
make-3.81-19.el6
net-tools-1.60-110.el6_2.x86_64 (for Oracle RAC and Oracle Clusterware)
nfs-utils-1.2.3-15.0.1 (for Oracle ACFS)
sysstat-9.0.4-11.el6 (x86_64)
smartmontools-5.43-1.el6.x86_642、创建用户、目录(2个节点都要配置)
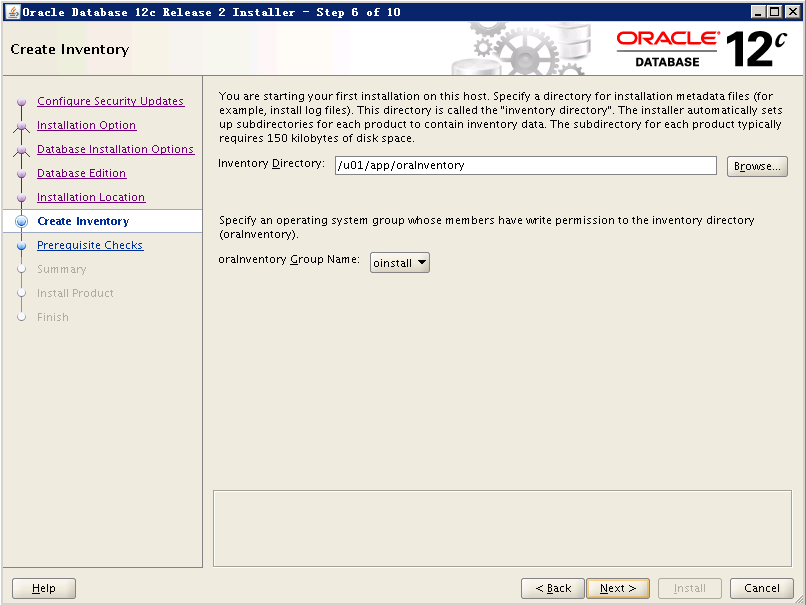
groupadd -g 54321 oinstall
groupadd -g 54322 dba
groupadd -g 54323 oper
useradd -u 54321 -g oinstall -G dba,oper oracle
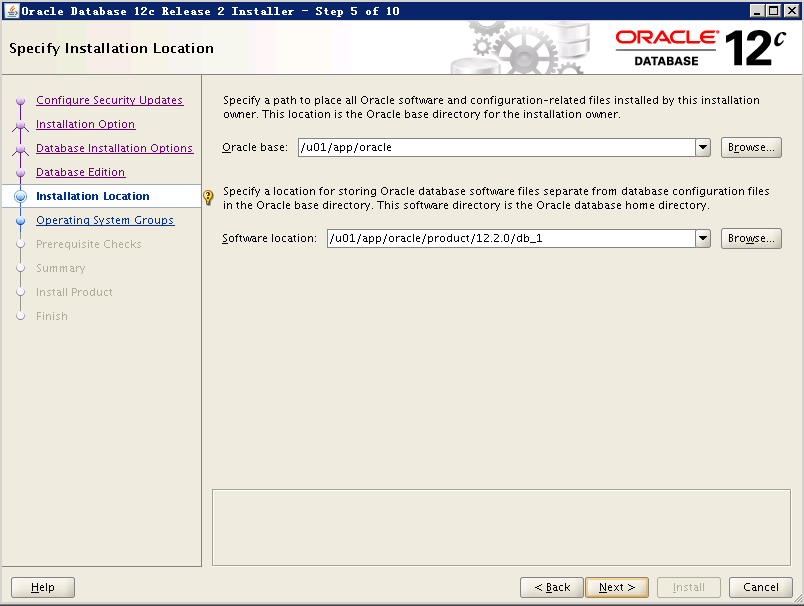
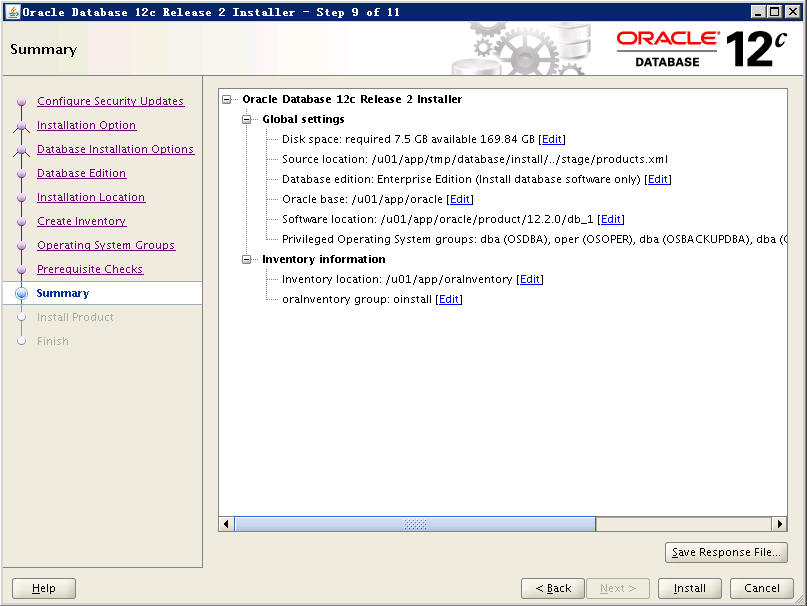
mkdir -p /u01/app/oracle/product/12.2.0/db_1
chown -R oracle:oinstall /u01/app
chmod -R 775 /u01/app3、修改主机名、ip
vi /etc/hosts
192.168.0.10 oracle
vi /etc/sysconfig/network
oracle
hostname oracle
4、配置系统参数
修改内核参数
vi /etc/sysctl.conf
# for oracle
fs.aio-max-nr = 1048576
fs.file-max = 6815744
kernel.shmall = 1364702 #物理内存/4k,See Note: 301830.1 for more information.
kernel.shmmax = 2794909696 #物理内存*0.6 (or higher at customer's discretion - see Note:567506.1)
kernel.shmmni = 4096
kernel.sem = 250 32000 100 128
kernel.panic_on_oops = 1
net.ipv4.ip_local_port_range = 9000 65500
net.core.rmem_default = 262144
net.core.rmem_max = 4194304
net.core.wmem_default = 262144
net.core.wmem_max = 1048586
vm.swappiness=10
运行以下命令生效:
sysctl -p

加载pam_limits.so模块
vi /etc/pam.d/login
session required pam_limits.so

修改用户参数
vi /etc/profile
if [ $USER = "oracle" ] || [ $USER = "grid" ] ; then
    if [ $SHELL = "/bin/ksh" ]; then
       ulimit -u 16384
       ulimit -n 65536
    else
       ulimit -u 16384 -n 65536
    fi
fi

vi /etc/security/limits.conf
oracle soft nofile 1024
oracle hard nofile 65536
oracle soft stack 10240
oracle hard stack 32768
oracle soft nproc 2047
oracle hard nproc 16384
root soft nproc 2047

* soft memlock 157286400  #90% RAM FOR HUGEPAGES 单位是k
* hard memlock 157286400  #90% RAM FOR HUGEPAGES 单位是k
5、关闭防火墙
vi /etc/selinux/config
SELINUX=disabled
需要重启。
service iptables stop
chkconfig iptables off
6、关闭NTP
service ntpd stop
chkconfig ntpd off
rm -rf /etc/ntpd.conf
rm -rf /var/run/ntpd.pid
7、上传软件包到/u01下解压
7.1、解压软件(12cD的软件都直接解压在oracle_home目录下)
chown -R oracle:oinstall linuxx64_12201_database.zip
chmod -R 775 linuxx64_12201_database.zip
unzip /u01//linuxx64_12201_database.zip -d /u01/app/oracle/product/12.2.0/db_1/
7.2、执行安装
[oracle@RmanDB ~]$ /u01/app/tmp/database/runInstaller
Starting Oracle Universal Installer...

Checking Temp space: must be greater than 500 MB. Actual 175476 MB Passed
Checking swap space: must be greater than 150 MB. Actual 81019 MB Passed
Checking monitor: must be configured to display at least 256 colors
>>> Could not execute auto check for display colors using command /usr/bin/xdpyinfo. Check if the DISPLAY variable is set. Failed <<<<

Some requirement checks failed. You must fulfill these requirements before

continuing with the installation,

Continue? (y/n) [n] y
图形如下所示:
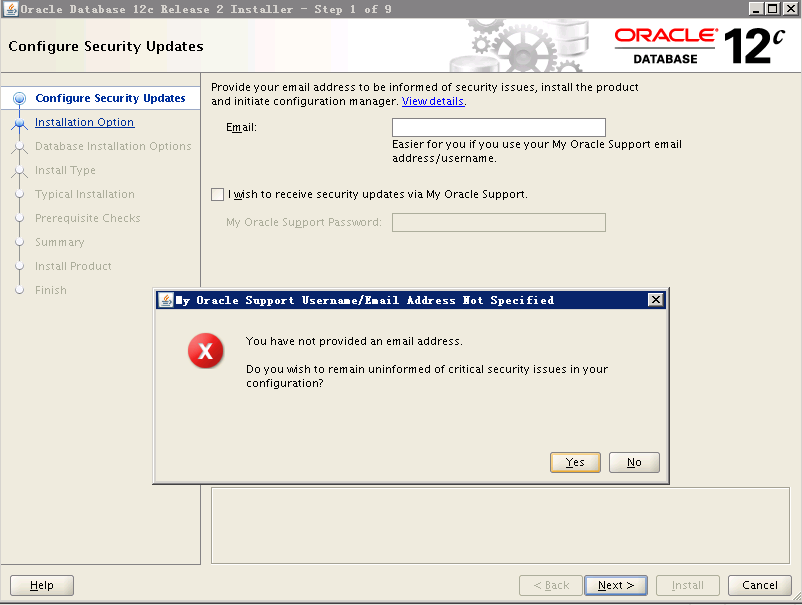
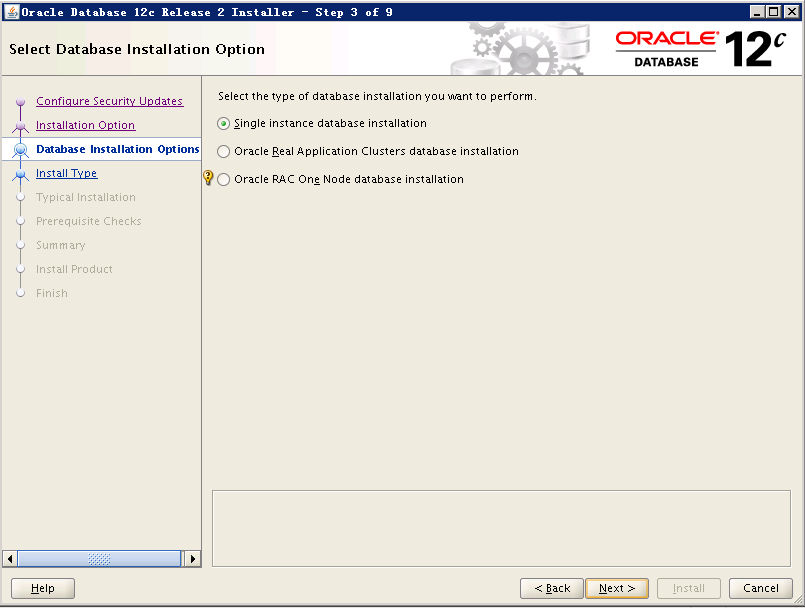
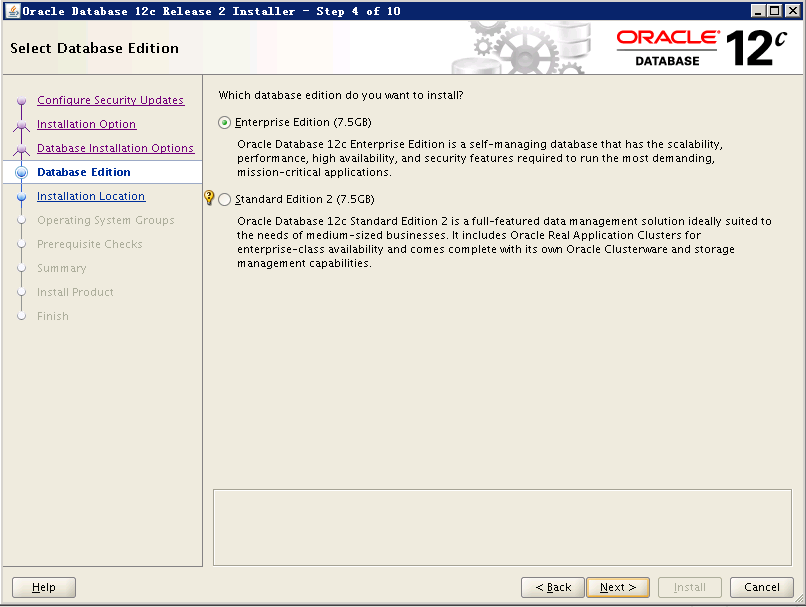

如果检查出问题,请先解决再行安装否则可能安装失败
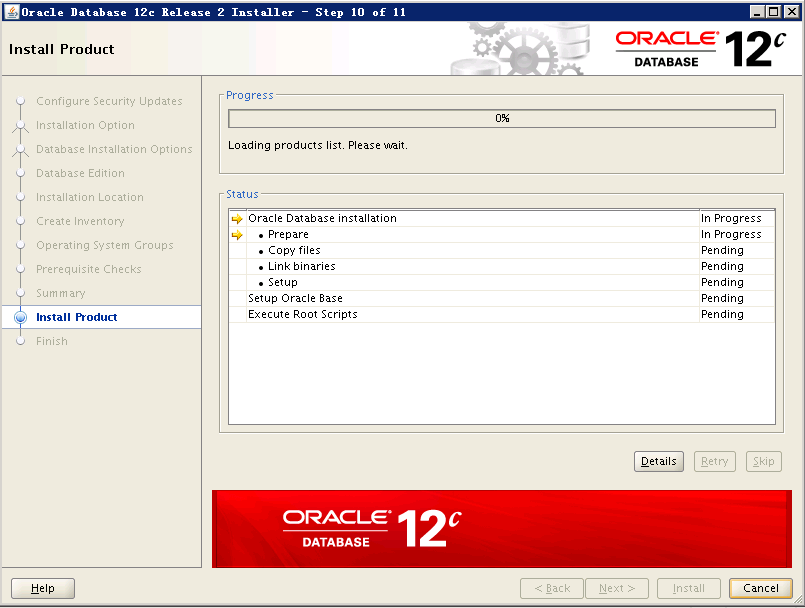
根据提示,root用户执行脚本
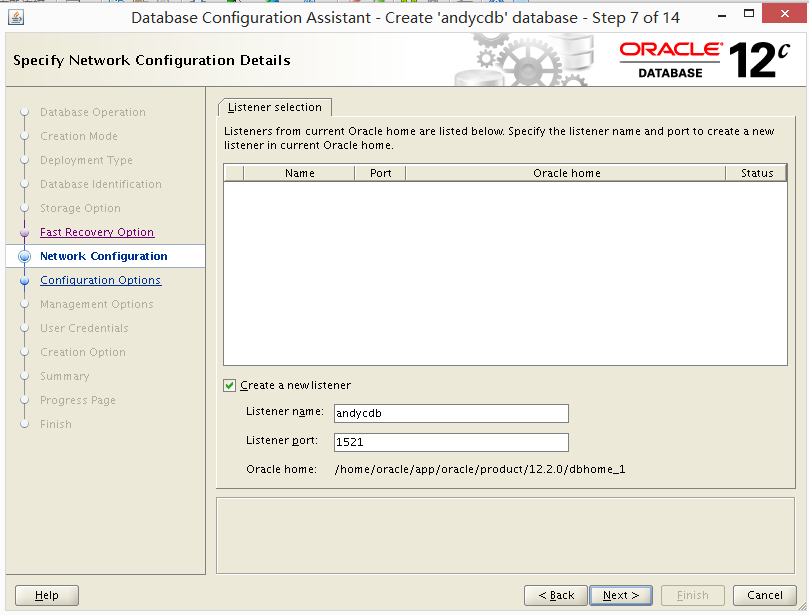
8、开启监听,创建实例
lsnrctl start
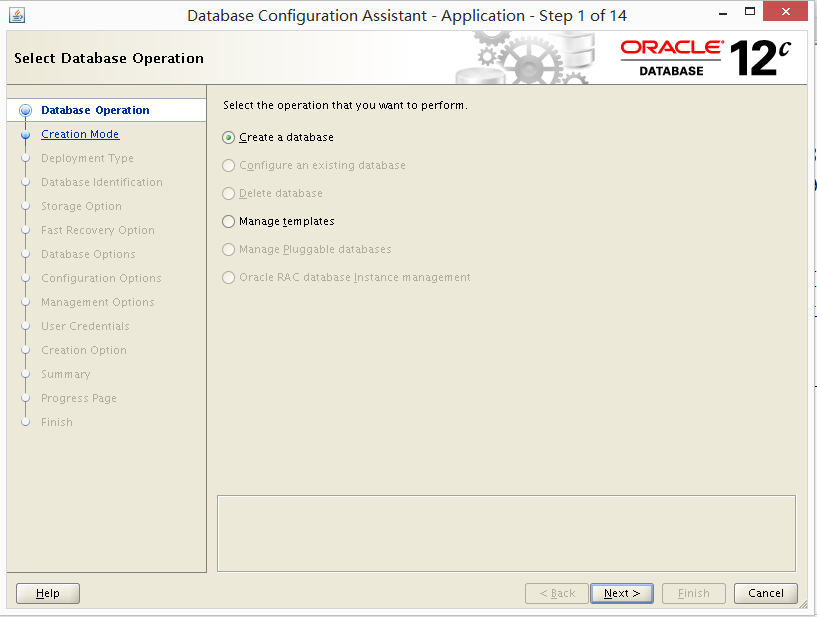
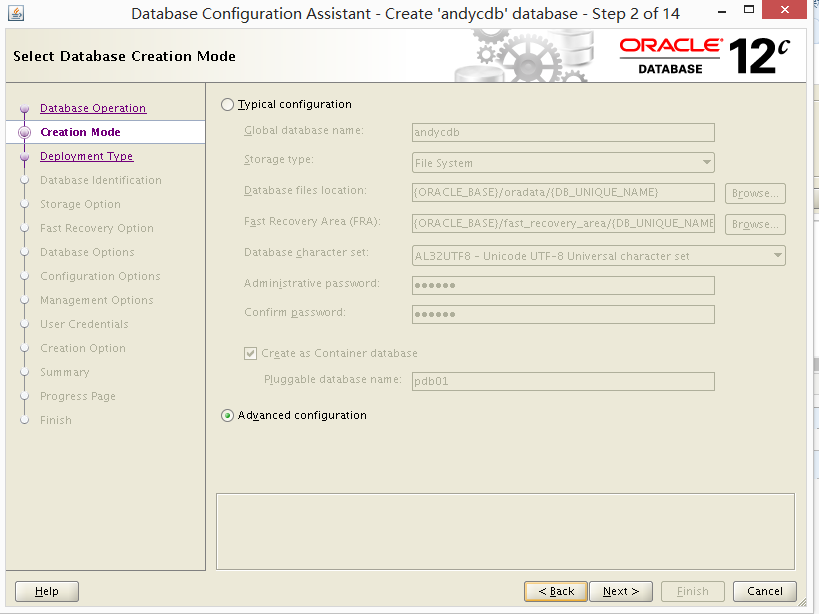
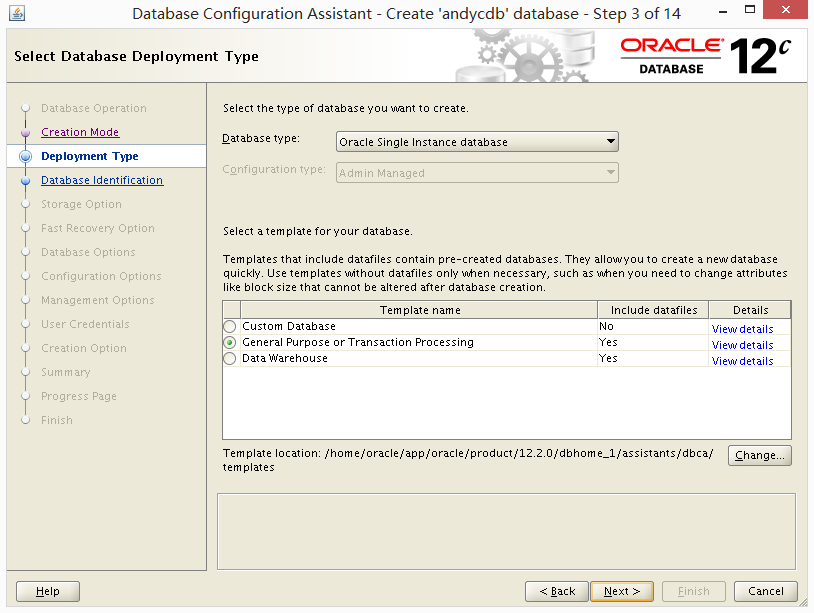
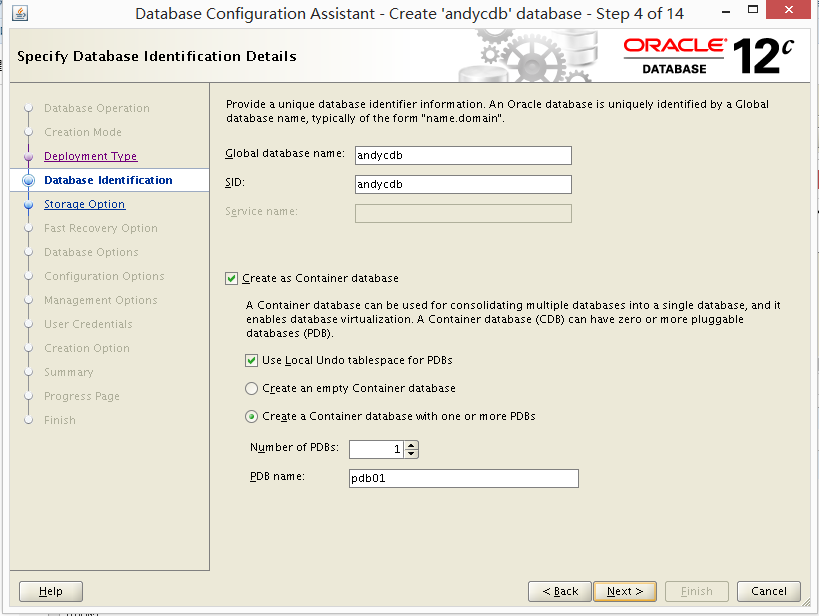
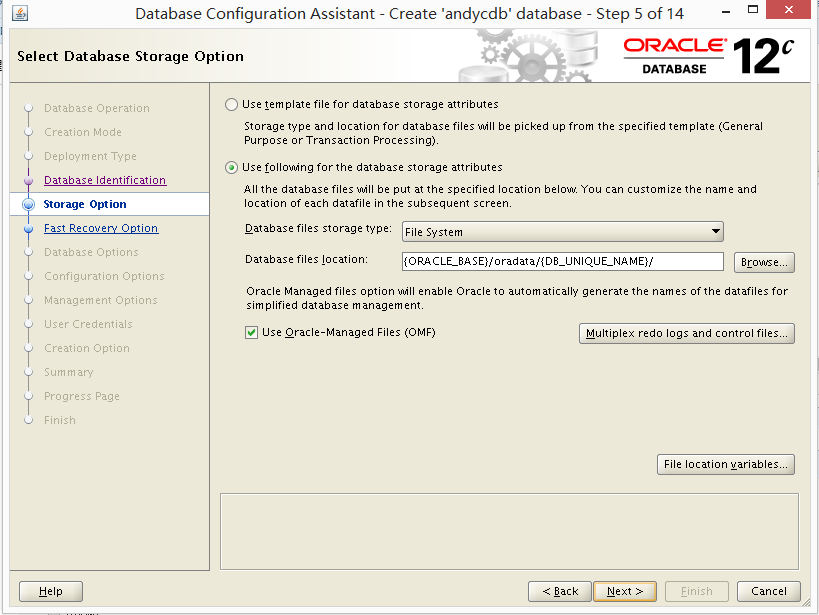
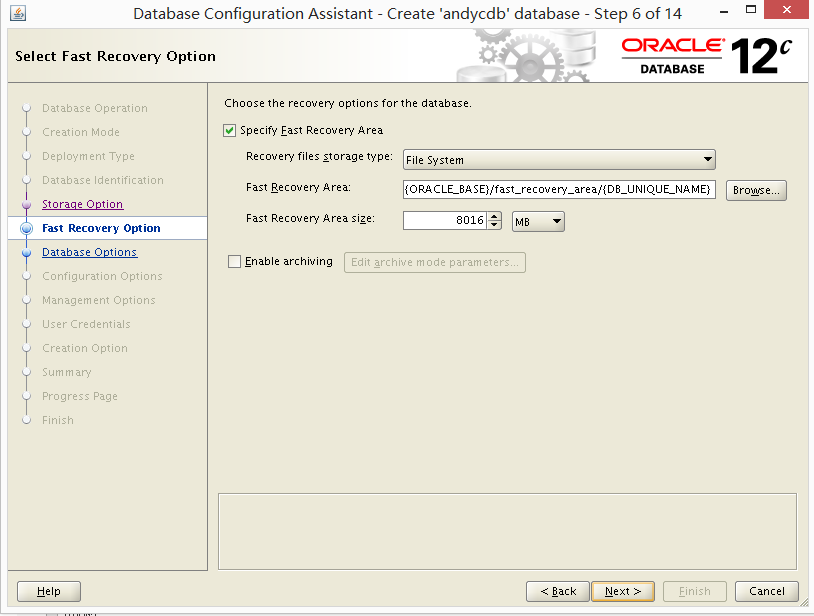
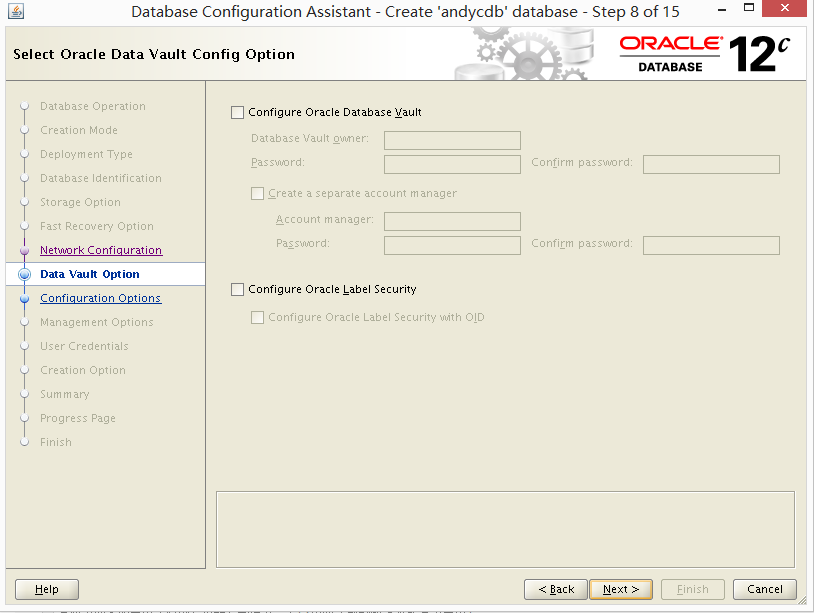
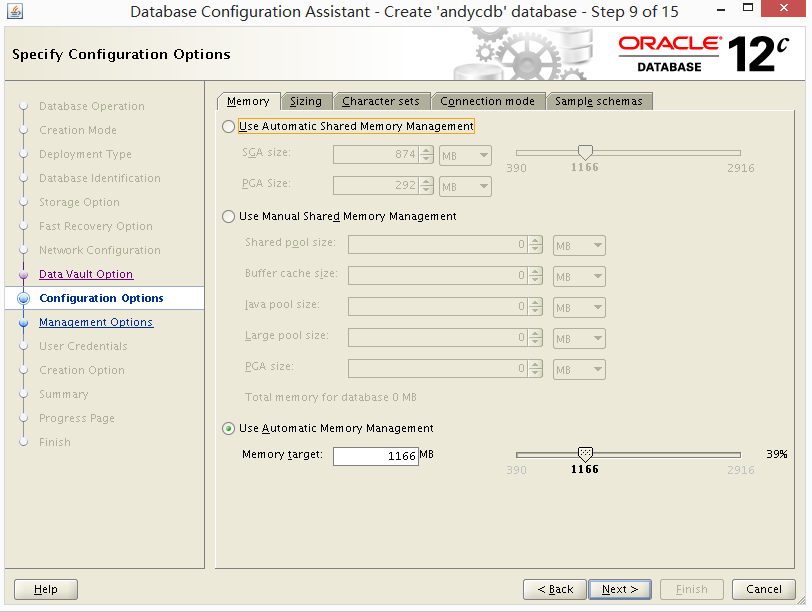
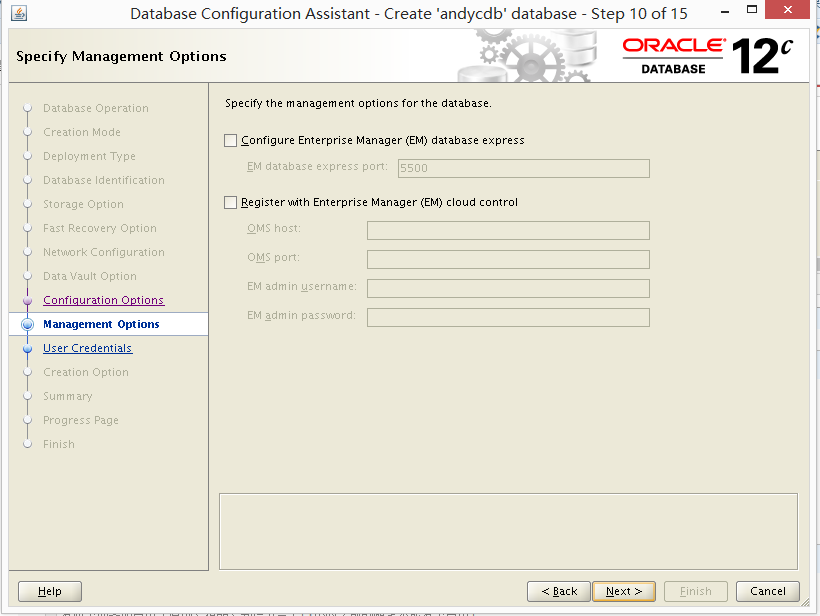
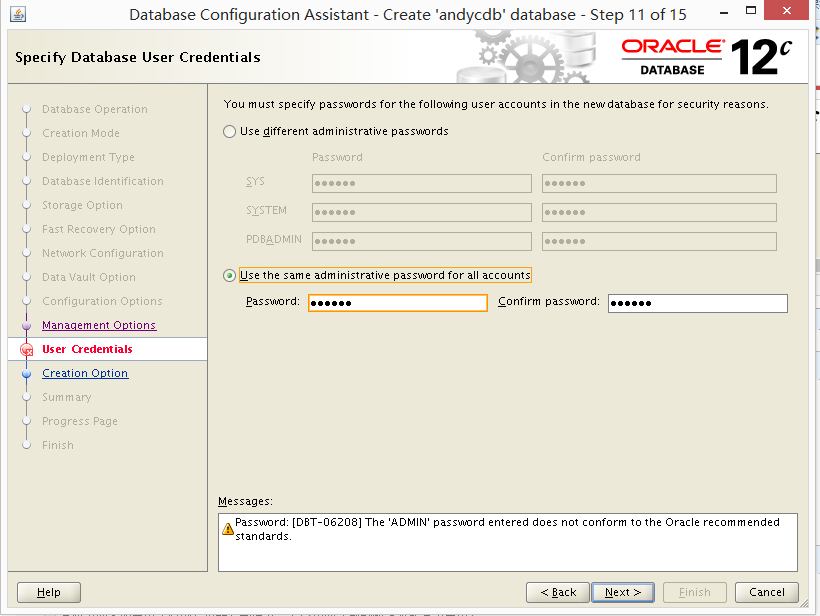
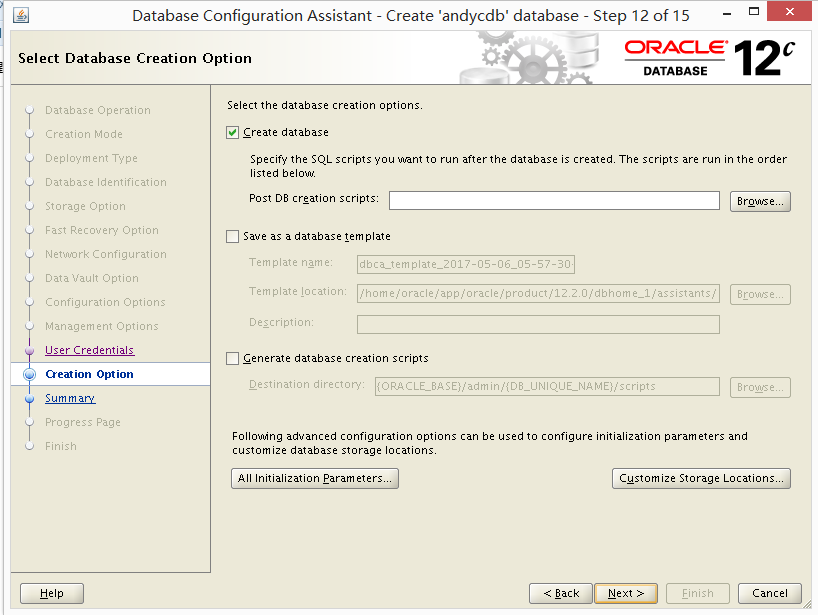
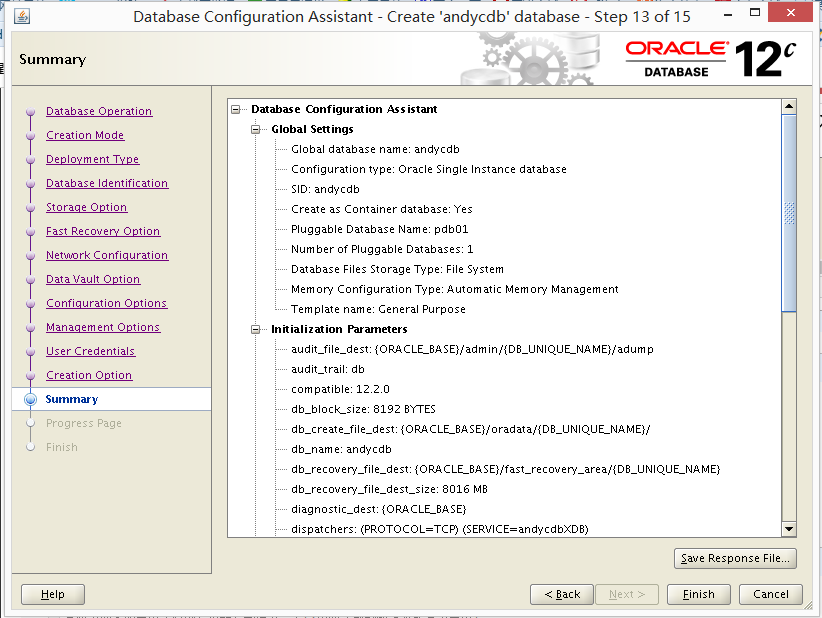
图形化创建实例,并创建pdb:
dbca
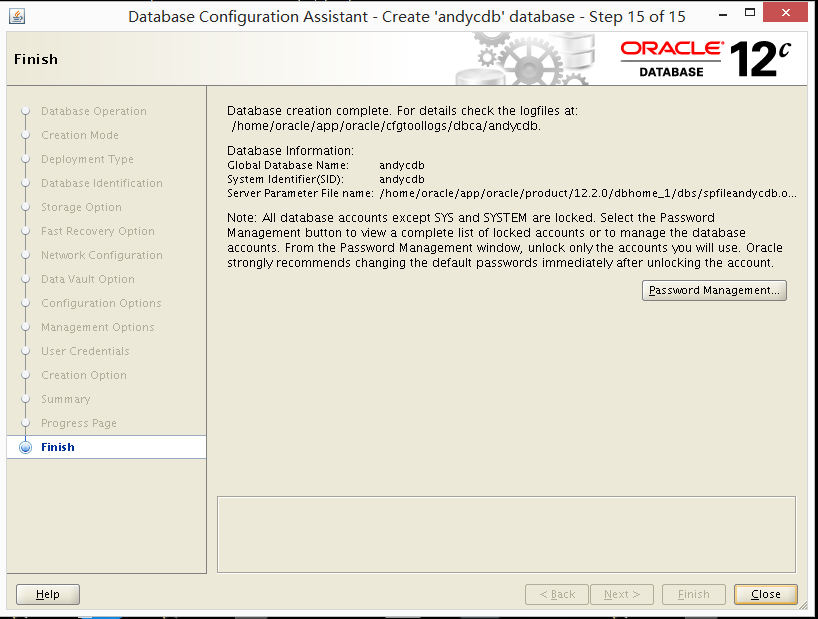
9、检查实例是否安装成功
select name,cdb from v$database;
NAME CDB
--------- ---
ANDYCDB YES
SQL> show pdbs
CON_ID CON_NAME OPEN MODE RESTRICTED
---------- ------------------------------ ---------- ----------
2 PDB$SEED READ ONLY NO
3 PDB01 READ WRITE NO

select * from dual;